I have been searching for a good place to start, but have found mainly overly technical specifications, overviews and reference material. One good article I have found is Getting Started with Cocoa Programming. The article provides a sample project used in their book Cocoa Programming for Mac OS X, 2nd Edition. While my ultimate goal is to learn iPhone development, I found this guide to be an excellent start to learning Xcode and Interface builder. While the guide is very thorough, I am providing an updated version based on my experience in Xcode and Interface Builder 3.2.2.
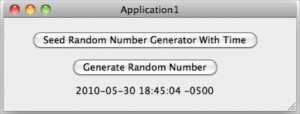
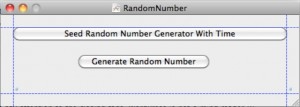
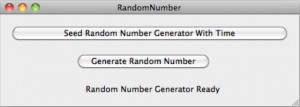
The final project is shown in Figure 1. The program has a single window with two buttons and a text field.
Create a New Project
After starting Xcode, first step is to create a new Project. In the menu bar, choose: File -> New Project .. (Shift-Ctrl-N). When you see the New Project Window (see Figure 2), choose Application under Mac OS X on the left. Then you will need to select Cocoa Application.
After clicking the button Choose.. at the bottom right of the window, a small popup should appear asking for the Project name (Figure 3). I am going to use the name RandomNumber and will save it in the default location Documents, and click Save.
After the project is created, you should find yourself with a new Project Overview window for RandomNumber (Figure 4).
One cool thing to notice is that the Project compiles and executes right out of the box. So if you click Build and Run (Ctrl-Enter), you should have the following blank window displayed (Figure 5).
Next step is to build the interface view. In the Overview on the left you will find MainMenu.nib under Interface Builder Files. By double clicking on it, the computer should open Interface Builder. To start you will need to add two buttons and a field from the Library (Shift-Cmd-L). Click on Push Button (Figure 6) and drag it to the blank window.
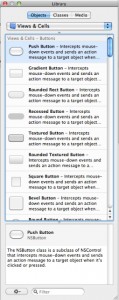
Figure 6: Interface Builder Library
After dropping the Button, you can move it around to the top of the window. Then you can click and drag from the sides of the button to adjust the side of the button. Interface Builder provides layout guides to help provide uniform layouts. Then by double clicking on the text in the button, change it to Seed Random Number Generator With Time (Figure 7).
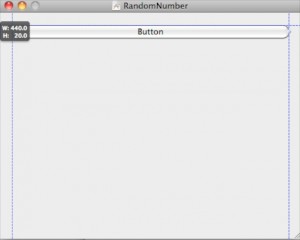
Figure 7: Adding Buttons
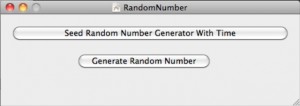
After this is done add a second button underneath the first with the label Generate Random Number. Once this is done, you should have something that resembles Figure 8.
Once this is done, the next step is to add a text label. So click on Label from the Library (Figure 9) and drag it to the Window.

Figure 9: Add Text Library Object
After placing the label, move it into position and adjust the width to fit the Window. Once this is done, the final two adjustment you need to do are (1) Delete the placeholder text for title and (2) change the alignment to be center justified. Click the Center alignment in the Attributes Window (Figure 10)
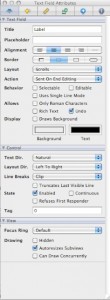
Figure 10: Text Label Properties
The final adjustment you need for the layout is to adjust the size of the Window to fit our interface. Once you are done, you should have the following layout (Figure 11).
Now that the interface is complete, proceed to add a class to provide the backend functionality for our RandomNumber project.
Create a Class in Interface Builder
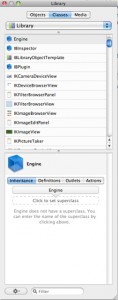
In the Library View, select the Classes tab. Then scroll down to NSObject (Figure 12)Â and drag it into the MainMenu.xib workspace.
Then click on the name Object and rename it to Engine (Figure 13).
Once the class is placed. you now have an instance of class NSObject named Engine. However. Â what you want to have is a class Engine that is a subclass of NSObject. This way you can add your own attributes and behaviors to the class. To change the class of Engine, click on Engine and then load the Identity Inspector (Cmd-6) (Figure 14).
Click on the Class field, and change the name from NSObject to Engine (Figure 15).
Then click on the goto arrow on the right side of the input field to see the Engine class in the Library Classes view (Figure 16).
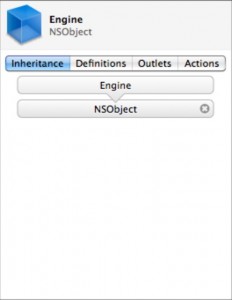
With the Engine class selected, click on the inheritance tab (Figure 16). Click on Click to set superclass. Enter NSObject. Once completed, Engine should look like Figure 17.
Note: the tutorial from informit.com created the class before the instance, and also used the name Foo instead of Engine.
Next proceed to creating outlets and actions for Engine. In the Outlets tab in the Library window (Engine class is selected), click on the + at the bottom and add a outlet named textField with the type NSTextField. (When typing in the Type, there is an autocomplete functionality). Note that the common practice for field names is to use lower case to start the name, but to then capitalize every other word in the name. (Figure 18).
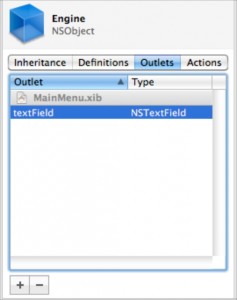
Figure 18: Engine Outlets
Next, you will need to add two actions. Click on the + and add an action seed: and then generate: (Figure 19).
Making Connections
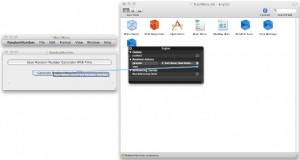
With the Engine class created, you will need to begin connecting our backend Engine with the components from our view. In the Library view, Ctrl-Click on Engine to view the properties. Click on the right circle next to generate: under Received Actions, and drag the mouse to the Generate button (Figure 20).
Once done, the properties inspector should look like Figure 21.
Repeat the same process for the seed: action (Figure 22)
Next you need to repeat the same process for the textField Outlet (Fiugre 23).
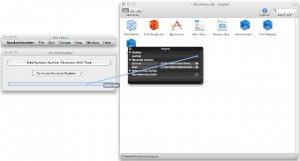
Figure 23: Add textField Action
Once all this is accomplished, you should have the following view in the inspector view (Figure 24).
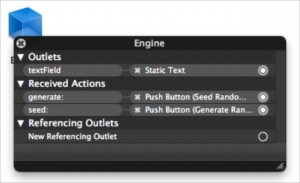
Figure 24: Completed Outlets and Actions
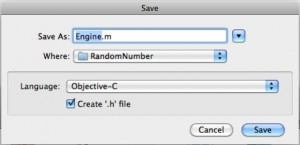
With the Interface Builder portion of our development done, proceed to Save the Interface Builder Project using File -> Save (Cmd-S), and then output the classes to be used for Xcode using File -> Write Classes. You should see a Save dialog pop up (Figure 25).
Use for the defaults for the class name. Note that the box for Create ‘.h’ file is checked. This tells Interface Builder to generate both the class files and header files for our new class. After clicking Save, you will be prompted to add the files to the project (Figure 26). Click Add.
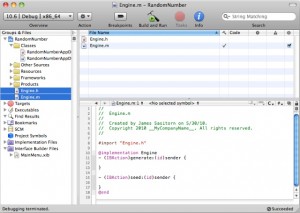
Return to Xcode and should see the new files for Engine created from Interface Builder (Figure 27). For organizational places, you can move them to the Classes folder.
Click on Engine.h. In this file you will see the following code:
#import <Cocoa/Cocoa.h> @interface Engine : NSObject { IBOutlet NSTextField *textField; } - (IBAction)generate:(id)sender; - (IBAction)seed:(id)sender; @end |
You can see here that the new Class Engine is created using the @interface keyword. The superclass NSObject is specified following the color ‘:’. Engine has one field textField of type NSTextField with the modifier IBOutlet from Interface Builder. Then below, there are two actions, both with return type IBAction that take in a single argument for the sender. Engine.m is similarly defined:
#import “Engine.h”
@implementation Engine - (IBAction)generate:(id)sender { } - (IBAction)seed:(id)sender { } @end |
You will need to modify the generate: and seed: actions to provide the functionality you want for your RandomNumber application. Change Engine.m to the following:
#import "Engine.h" @implementation Engine - (IBAction)generate:(id)sender { int rand; rand = (random() % 100) + 1; //Generate a number between 1-100 [textField setIntValue:rand]; } - (IBAction)seed:(id)sender { srand(time(NULL)); //seed random generator [textField setStringValue:@"Random Number Generator Ready"]; } @end |
The objective-C code for generate: and seed: is similar to traditional C code, with a couple of differences. Calling a method on a instance, e.g. textField requires using ‘[‘ and ‘]’. generate: calls the method setIntValue passing the int value rand on the field textField. With these methods completed, you can now click on the button Build and Run (Cmd-Enter).
Clicking on the buttons produces output in the text field at the bottom of the window.
Congratulations the RandomNumber Project is fully functional. Enjoy!








0 Responses
Stay in touch with the conversation, subscribe to the RSS feed for comments on this post.