After completing my RandomNumber Cocoa application, I decided to try to port the project over to the iPhone. Unfortunately, I encountered a mysterious EXC_BAD_ACCESS error because an object I instantiated in Interface Builder is being dealloc-ed immediately after it is created. I posted this discussion over at forums.macrumors.com, and was able to find an answer by PhoneyDeveloper that explained why I encountered the EXC_BAD_ACCESS error in the iPhone Application but not the Cocoa Application.
There are differences in how outlets are managed between MacOS X cocoa and iPhone OS UIKit. On UIKit you need to retain all top level objects from your nib. This is almost always done by having retaining properties for your IBOutlets.
I am waiting to hear back if there is a property I need to add to get my Interface Builder-instantiated class to work correctly. Once I am able to remedy the issue, I will post a tutorial for my RandomNumber iPhone application. As an aside, an alternative that works is to do the linking through the ViewController (which is the standard way if you instantiate the classes through Xcode instead of Interface Builder, since, as the owner of the View, it will not be dealloc-ed.
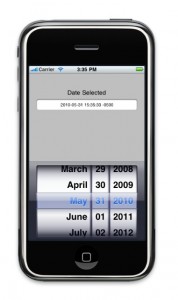
In the meantime, I have created a short tutorial on how to use the UIDatePicker class. While my tutorial is based on this tutorial,  my goal is to understand how to use these different UI components, and understand the process flow between Xcode and Interface Builder. The final  UIDatePicker product looks like:
Step 1: Creating the Project and Interface
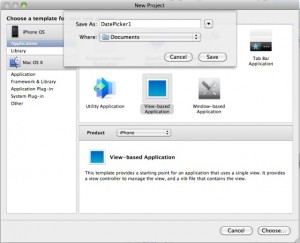
First, you will need to create a new Project : File -> New Project (Shift-Cmd-N). Choose: IPhone OS -> View-based Application with Product: iPhone. Click Choose… and specify the name DatePicker1.
You should then see a new project window with all your files and resources. Click on DatePicker1ViewController.xib to open up Interface Builder. Once in Interface Builder we will add three components: (1) a UIDatePicker, (2) a UITextField, and (3) a UIField.
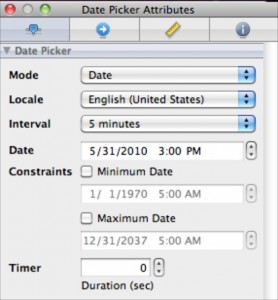
1. Drag and drop a UIDatePicker from the Objects section in the Library Window to the bottom of the window. In the attributes viewer change the mode to Date (Figure 3)
2. Then drag and drop a UIField to the top of the window. Adjust the width to fill the screen. Change the value to “Date Selected”. Set the field to be center-justified.
3. Then add a UITextField underneath it. Adjust the width to fill the screen and set it to be center justified.
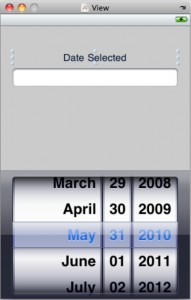
Your final product should look like:
Now that the interface is done, Save your work and return to Xcode. In Xcode you will now add the backend to our interface. First, in the file DatePicker1ViewController.h, change the file from:
#import <UIKit/UIKit.h&Gt; @interface DatePicker1ViewController : UIViewController { } @end |
to:
#import <UIKit/UIKit.h&Gt; @interface DatePicker1ViewController : UIViewController { IBOutlet UIDatePicker *picker; IBOutlet UITextField *field; } -(IBAction)displayDate:(id)sender; @end |
What you are doing here is adding two fields to our controller. Â The class will keep a pointer to the UIDatePicker and UITextField in the UI. You need to use the keyword IBOutlet so these outlets will be visible in Interface Builder. Then outside the class declaration, add the action displayDate.
Then in DatePicker1ViewController.m, provide the body for displayDate. You will also need to provide a method called viewDidLoad to initialize our Interface properly. (The IBOutlet fields are assigned after alloc(), but before viewDidLoad(). So I believe this is the proper place to initialize the UI.
-(IBAction)displayDate:(id)sender { NSDate * selected = [picker date]; NSString * date = [selected description]; field.text = date; } - (void)viewDidLoad { NSDate *now = [NSDate date]; [picker setDate:now animated:YES]; field.text = [now description]; } |
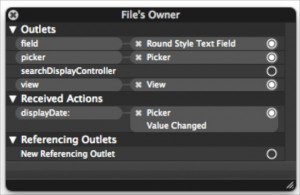
With this done, save and return to Interface Builder. You will add the actions and outlets to complete the DatePicker1 project. Cmd-Click on the DatePicker1’s File Owner and add the following connections:
- Outlet from field to the UITextField
- Outlet from picker to the UIDatePicker
- Connection from displayDate to the UIDatePicker for the action Value Changed.
Once this is done, save your work in Interface Builder and return to Xcode. Click Build and Debug (Cmd-Enter). The contents of the text field should change when you change the date in the date picker.
0 Responses
Stay in touch with the conversation, subscribe to the RSS feed for comments on this post.